Monday, August 31, 2009

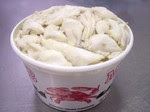
Corn Chowder, pure comfort food...

Over the weekend we had the best dinner of Bar-B-Que Shrimp, a great tossed green salad and some wonderful sweet corn I found at the farmers market. Everything was so good and there wasn't a single shrimp left over but there were 6 ears of corn not touched. Now I don't blame anyone, who wants veggies when you have all you can eat shrimp. Actually I am kind of glad it's still here because, today being a cool day with thoughts of fall coming in the air, I am going to cook a pot of my favorite soup, Corn Chowder! This is a wonderful soup for days like today or even in the dead of winter when I use bagged frozen corn. Serve it with your favorite crackers or crusty bread and it becomes the perfect comfort food, it sure is for my family.

Jeanne's Corn Chowder (careful even reading the recipe goes to your hips)

Clean and shuck 6 or 8 ears of fresh corn and cut off all the kernels with a sharp knife. Scrap down the cobs, after removing the corn, into the bowl so you don't miss any of the creamy goodness left on the cob.
Cook up 6 slices of bacon until crispy and remove from the pan saving the bacon drippings.
Into the bacon drippings add 2 tablespoons of butter for flavor,
Add a medium onion chopped small to the pan and cook ten minutes to soften the onion.
Peel and chop to bite size pieces three potatoes. Add to the cooking onions.
Add one can of chicken broth/stock or vegetable if you prefer to the pan.
Add one cup of milk to the pan. Stir well and add salt and pepper to your taste. I like a lot of pepper in mine.
Stir in all of the corn and corn scrapings to the mixture in the pan and taste again to see if it needs more salt and pepper.
Lower the temp to low and let it cook thoroughly into potatoes and all the corn is tender. Don't cover because you don't want boil overs and you want the liquid to reduce just a little.
At the end stir in one cup of heavy cream, a tablespoon of chopped fresh parsley and the crumbled crispy bacon.
Serve hot with your favorite sides and enjoy.
P.S. A long walk around the block after dinner always helps with the zillion yet wonderful calories.

Thursday, August 27, 2009

Shrimp, Glorious Bar-B-Que Shrimp...


With company coming this weekend I have decided to pull out one of my favorite recipes. I found this about 5 years ago in Southern Living and it became an instant favorite to all that tried it that night. It is one of those recipes that everyone asks for, so before I start claiming it again as my own, here it is. It's warm, wonderful, spicy, mmm mmm good Bar-B-Que Shrimp. It is super easy once you gather all the ingredients. The shrimp can get a bit pricey so I keep it in my freezer when I can get it for deals. When we go to the Outer Banks of North Carolina each September we always make a trip to the shrimp boats and look for good prices. It is so very fresh that way, we buy around twenty five pounds, pack it on ice, and when we get home we pack them in freezer zip lock bags and then fill the bags up with cold water before sealing them. If you fill a bag up with water before you freeze any shrimp or other fish, they stay as fresh as can be since freezer burn can't get through the water in the bag. Try it, it works and you'll have fresh seafood in your freezer all year round.

Southern Bar-B-Que Shrimp
Fabulous served with Crusty French Bread or on top of Creamy Grits
Makes 6 to 8 servings

Ingredients
5 or 6 pounds unpeeled, large fresh shrimp
1 cup butter
1/2 cup olive oil
1/4 cup chili sauce
1/4 cup Worcestershire sauce
3 lemons, cut in wedges
4 garlic cloves, chopped
2 tablespoons Creole seasoning
2 tablespoons lemon juice
1 tablespoon chopped parsley
1 teaspoon paprika
1 teaspoon oregano
1 teaspoon ground red pepper
1/2 teaspoon hot sauce or more to your liking

Spread shrimp in a shallow, aluminum foil-lined broiler pan.
Combine butter and next 12 ingredients in a saucepan over low heat, stirring until butter melts, and pour over shrimp. Cover and chill 2 hours, turning shrimp every 30 minutes.

Bake, uncovered, at 400° for 20 minutes; turn once. Serve with bread or grits.

Pour it into a big bowl on the table and let your company help themselves. Have lots of spoons for dipping that rich, buttery sauce so they can dip their bread into it as they eat the shrimp. Suck off the seasonings before you peel the shrimp and you will be happy you did. Great with either a terrific glass of wine or a cold beer.

I hope you love this as much as we do and if you smell them cooking on Saturday night, ya'll come!

Wednesday, August 26, 2009

I Brake for Boiling Peanuts...


While doing a little chair dance here at my computer, I get to finally say I'll be going on vacation in just 3 weeks. I love going on vacation and look forward to the next one as soon as one is over. Crazy I know, but even nuttier is one of the reasons I look forward to vacation... Boiled Peanuts! You see we always go south for vacation, to the Outer Banks of North Carolina, and along the drive from Maryland we go past so many peanut stands that our stops change the 5 hour drive to 6 or more. We need a bumper sticker that says I Brake for Boiled Peanuts.

I can remember, as a little girl, my Grandma had a peanut patch and each year we would dig up the peanuts, clean them off and drop them into the big pot of boiling water that had been loaded with salt, actually there was so much salt it was more like a boiling brine. You can only boil the raw (green) peanuts and a good rule of thumb is 1/3 to 1/2 cup of salt for every ten pounds of peanuts you're boiling. Keep them at a good but low rolling boil for between 1 to 10 hours. You need to stir them every twenty minutes or so and taste them every hour untill you have reached the tenderness you like. We usually plan on 3 hours on a low boil, uncovered always, to get the tenderness we like best. We enjoy ours boiled only in salt but many other seasonings can be added during the boiling time such as Cajun seasoning, crab boil, jalapeno peppers, garlic or what ever is your desire.

After they have reached the perfect tenderness, then drain them well and dig in by biting down on the shell and sucking that warm, wonderful and briny peanut out of its soft shell. The peanuts are soft and tender, very much like a bean texture, and besides how great they taste they are fantastic for you. Boiling them are much better for you since you have more poly phenol antioxidants than roasted ones.

After you have eaten your fill you can pack all the left overs in zip lock bags and either refrigerate them or place them in the freezer for longer storage time. It is possible to buy boiled peanuts in a can at your grocery store but it doesn't have the same taste or effect as eating them warm from the pot.

I hope you have the opportunity to try them sometime. Stop at one of the road sides stands and dig into those wonderful, warm shells and imagine your headed to the beach. It's a great fantasy and I look forward to living it every September.

Health Note added 8/28/09
1. Breaking News from Alabama A&M University's Department of Food and Animal Sciences...A new study by a group of Huntsville researchers found that boiled peanuts bring out up to four times more chemicals that help protect against disease than raw, dry or oil-roasted nuts. These phytochemicals have antioxidant qualities that protect cells against the risk of degenerative diseases, including cancers, diabetes and heart disease.

2. Boiled Peanuts contain resveratol, a plant chemical also found in red wine, which studies have shown to have a protective effect against cancer and heart disease.

3. Major studies have found eating peanuts can lower the risk of heart disease, cut the risk of diabetes and assist dieters.

4. Boiled peanuts are loaded with many vitamins and minerals and they are high in plant protein. Also, the fat content is primarily monounsaturated and polyunsaturated.

Saturday, August 22, 2009

I Love Pralines...

Sitting here missing New Orleans and badly wishing for a few pralines to savor, I came across a web site that made me wish I was there right now. I make pralines as gifts during the holidays but the best of them are found either in Savannah or in New Orleans. Here is a link to a fabulous shop in Savannah that has the greatest southern candies. River Street Sweets (note their photo)

While I looked through the site on the French Quarter I came across this interesting history of the Praline. For my fellow lovers of pralines, and all things pecan, I thought I would share their story. I am quoting them exactly, actually cutting and pasting is the correct term, and I am hoping they won't mind with a link here to their very informational site. French Quarter. The history was written by Mr. Ian McNulty.

"France to the banks of the Mississippi River"

"There are many variations on the story of how the praline came to be, but most of them revolve around the manor house of the 17th-century French diplomat Cesar du Plessis Praslin - a name that later morphed into the term for the candy. A chef in the kitchen here developed a technique for coating almonds in cooked sugar which, competing stories hold, were used by his courtly employer either as a digestive aid or as gifts to the ladies he visited. In France and elsewhere, the word praline is still used as a generic term for any sort of candy made with nuts.

These early confections traveled with Frenchmen to their new colony on the banks of the Mississippi, a land where both sugar cane and nuts were cultivated in abundance. In local kitchens, Louisiana pecans were substituted for the more exotic almonds, cream was added, giving the candy more body, and a Southern tradition was born.

The candy's winning flavor has led to worldwide popularity, and, as such things go, varying pronunciations and hybrid recipes. For the record, the local and proper pronunciation is "prah-lean," while the nut most commonly used in it is pronounced "peck-on." Just remember that, in New Orleans, a word pronounced "pray-lean" means nothing except, perhaps, a posture the supplicant faithful assume while petitioning God.

Even before the Civil War and Emancipation, pralines were an early entrepreneurial vehicle for free women of color in New Orleans. In 1901, the Daily Picayune (a predecessor to today's Times-Picayune newspaper) described in nostalgic terms the "pralinieres," or older black women, who sold pralines "about the streets of the Old French Quarter." They were often found patrolling Canal Street near Bourbon and Royal streets and around Jackson Square in the shade of the alleys flanking St. Louis Cathedral. And in the 1930s, the Louisiana folklorist Lyle Saxon, writing in the book "Gumbo Ya-Ya," documented praline sellers "garbed in gingham and starched white aprons and tignons," or head wraps, fanning their candies with palmetto leaves against the heat and bellowing the sales pitch "belles pralines!" to passersby."

Today you can still find praline makers selling their wonderful candies on the streets for around a dollar each. If you have never tried one they are rich, sweet, creamy and very sinful.

Friday, August 21, 2009

Fried Green Tomatoes...


I am so glad it is Friday! It was a great, but long week for me, and I am so ready to settle into a weekend, at home, doing some of my favorite things. Since I already have the house cleaned, it is going to be a fun time cooking favorite foods and watching old movies. First on the list, is to fry up a mess of fresh green tomatoes and re-watch, for I don't know how many times, the movie Fried Green Tomatoes. If you haven't seen it please check it out, it is really worth while watching and if you haven't fixed fried green tomatoes then now is the time. Yummy. I grew up on eating fried green tomatoes and Grandma and my Mom both made them slightly different then mine. Grandma would use lard and Mom would only use bacon fat. I will use bacon, if I have it, but half time I use equal parts of butter and vegetable oil. This weekend I am going for the bacon, it is something about the comfort food I feel I need, and give you Mom's recipe. I love it and I know you will too.

My Mama's Fried Green Tomatoes
Wash your green tomatoes off and dry with a soft cloth.
Slice them into nice thick slices a good half inch or more.
Salt and pepper them to taste on both sides.
While doing that fry your self up 6 to 8 slices of bacon.
Remove the bacon and leave the drippings in the frying pan. A good old black iron skillet would be perfect right now if you have one. If your bacon is very lean cook twice as much or add some vegetable oil to the drippings. You should have at least 1/2 to 1 inch fat in the pan.
In a low dish, like a pie plate, mix two lightly beaten eggs with a 1 1/2 cups of milk.
In a second low dish place one cup all purpose flour and one cup of corn meal. Note, I like to use bread crumbs half and half with the corn meal.
Add salt and pepper to the flour mixture to taste.
Take your thick slices of green tomatoes and dip them first, flip over while dipping, making sure to get the egg/milk mixture on both sides.
Then dip both sides in the flour mixture and make sure you have a good coating all around.
Lay them one at a time in the hot bacon fat and cook them at a medium heat on both sides until they are golden brown all over. They will get soft and tender in the middle and keep that wonderful green flavor.
Drain on a rack or on paper towels. I prefer the rack so they stay crispy longer.
Eat warm or room temperature since they are a great snack or side dish no matter the temp.

A plate of these crispy treats are always a comfort to me. They have a way of taking me back to Mama's old, round, wooden table in the kitchen, very hot southern, summer days and the sound of the fan spinning overhead. Fried green tomatoes are the stuff memories are made from.

Note: Crispy, fried green tomato photo from Southern Living. The best magazine for southern cooks.

Tuesday, August 18, 2009

I'm so happy today...

Note: I know, I'm bad and I am reposting this from my other blog Sugar Creek Beads today, but I am so so happy about this I had to share it here as well. I feel like shouting it out to everyone so here it is...

Today feels like a day to celebrate for me, like everything that makes me happy is all wrapped up in a beautiful box with a fabulous silk bow on top and it is all mine. You see, for the last several weeks I have been living under a dark cloud and just getting through each day by pretending all was well but it wasn't. It is hard to smile when fear is consuming your life but today the fear is gone and I am smiling so hard my face hurts.

I have been believing the past few weeks that I had cancer, the bad kind you don't get well from, and finally after test after test it seems the doctors were wrong and I am cancer free. Doctors are wonderful people and their intentions are good but they had made a terrible mistake in my diagnoses and the situation grew as fast as a snow ball rolling down a hill getting larger and larger, doctor by doctor. The funny thing about the snowball is the more they led me to believe I was sick the sicker I was getting. Power of suggestion is a dangerous thing. Well the great part is that they were completely wrong and I do not have the dreaded C word! I am a bit concerned about how one doctor believing something can snowball into other doctors just accepting what one said and not checking for themselves. If we had a different health care system what would have gotten through wrong?

That is all the bad thoughts I will have of them today because I am happy and my cloud is gone. I feel this is a day for fireworks and a picnic. Enjoy your day, I am!

Friday, August 14, 2009

What summer is all about...

This is a copy of a post I placed on my other blog, Sugar Creek Beads. Since some of my readers don't read that blog and this recipe is so good I thought I would put the post on here for your treat. Try this cause I know you'll love them.

This afternoon I called my Mom and let her know I was coming over to her place at the shore; she of course was thrilled and said "we'll have a picnic by the pool and you can fry up a few of the Vidalia onions I picked up this morning." Well, I didn't have to think twice about that because I am crazy about big fried onion rings and when they are made from Vidalias they are wonderful. Don't know Vidalias? Well, they are an amazingly sweet onion that are grown only in the summer and only in Vidalia, GA. They claim the sweetness in the onions come from the soil in that town and so if it wasn't grown in their soil you can't refer to any other sweet onion as a Vidalia. My recipe for the yummy onion rings are so good I thought I would share it with you.

Jeanne's Big Vidalia Fried Rings

Vegetable or canola oil for frying
2 large sweet Vidalia onions
2 cans Cold evaporated milk
1 1/2 cups all purpose flour
salt and pepper to taste
1 teaspoon cayenne pepper

Remove the skins from the onions and slice them into fairly thick slices, I do 1/2 to 1 inch. Separate the rings by pushing them apart with your fingers. You will use even the small circles from the middle.
In a low sided dish, like a pie plate, pour in your cold evaporated milk. Cold is important it sticks better.
In another low sided dish dump in the flour and stir in the salt, pepper and cayenne pepper.
Dip the onion rings first into the milk and then the flour mixture. To add to the crunch you do it again, into the milk and then again into the flour. That doubles the coating and makes a great crunch when fried.
Drop the coated rings into the hot 350 degree oil in a deep fryer or a sauce pan you have half filled with the oil. Use only half the pan so it doesn't bubble over and cause a fire.
Only put 5 or 6 rings in the pan at a time so as not to lower the temperature of the oil. When the temperature gets low it causes the rings or anything you cook this way to get greasy.
Flip them around in the oil until they are golden brown, remove from the pan and drain on paper towels. Give them a sprinkle with salt while still warm.
Serve in your favorite serving basket or dish lined with a napkin or more paper towels.
Add the dipping sauce you whipped up to the table and watch them go really fast. So good and yummy!

I make a dipping sauce with 1 cup mayo and 1/4 cup ketchup, a shake or two of Worcestershire, squirt of a half of a lemon and a couple shakes of a good hot sauce. Spice it up like your taste buds like it. Mm mm good or sweating hot is up to you.

Try these at your next party or just because, you'll love the wonderful taste of summertime, crunchy, Vidalia.

Thursday, August 13, 2009

My new and addictive toy...

Well, I did it. I broke down and bought a new toy this week. I really didn't need it and should have passed up the expense but I wanted to be like all the kids on the block and have one too. I got a new cell phone. The cell I had was a Razr, works perfectly well and I have no complaints other than I wanted to be like everyone else and have something I can't even begin to figure out.

I got a Blackberry. I figured if everyone was talking about them, and the President refused to give his up, then it must be the right one for me. I have to say it really is cool. I got the pink one to be extra cool and now I can't stay off the phone. I am texting like crazy (thank goodness for unlimited service)and sending photos, reading my email and even driving places just to use the GPS for directions. What is up with all that? I haven't spent this much time on a cell phone since I got one a few years ago. I can see now why the teens are always talking and texting. This toy is addictive and I don't even know how to run half the features yet. I can't wait for something to come up that I want to make a movie with sound; hey, did I mention it is an MP3 player and I can watch TV?

Okay, so I ask you, when does the honeymoon stop? I really do need to stay off the phone and only answer it when it rings because I am not getting everything done. This is embarrassing and I feel like I need the G3 Anonymous. I can just see me now at the meetings, I will be saying, "Hello, my name is Jeanne and I am addicted to a Blackberry".

Tuesday, August 11, 2009

Grandma's Fried Corn...


I love corn. I particularly love summer corn on the cob and my Grandma's favorite, fried corn. I know frying corn sounds a little strange but for a lover of good old fashioned southern food it is wonderful. My Grandma must have been thinking of me today because I have been craving it all day long. She would make it every time she had a mess of corn that had been picked and sitting around for several days. She said it was the "best use of old corn cause the bacon fat and a little milk would plump up those little kernels every time."

Craving it like I am and knowing I am going to go fix it soon I thought I would have to let y'all in on her recipe. It's terrific and I sure hope you try it soon.

Grandma's Fried Corn
We find 5 or 6 ears is enough for our family but adjust it to suit your group.

Cut the corn off the cooked (if you have leftovers) or uncooked cobs. I always take my knife and scrape down the cobs after I have cut off the kernels to get the extra juices left on the cob.
In a frying pan cook 3-4 slices of bacon till crispy.
While the bacon is frying chop up a sweet onion into small pieces not a whole lot larger than the corn kernels.
Remove the bacon from the bacon grease and drain on a paper towel.
Throw the chopped onion into the warn bacon grease (stand back some cause the bacon grease will spit).
When your onion starts to caramelize dump the corn kernels on top and stir into the onions.
Add salt and pepper now to your taste. Watch the salt cause bacon is a bit salty. We always add extra pepper now and adjust the salt at the table.
Put a lid on it and turn to low, stirring it every couple of minutes. "Don't let it burn, child" Grandma would always say.
After it starts to lightly brown up, and you think it is tender enough for your liking, then add a half cup of milk or cream to make it a tad creamy.
Sometimes she would crumble the crispy bacon into it and give it a stir or sprinkle it on top. Dump into a bowl and serve warm with the dinner. To her the bacon wasn't the important thing, the use of the bacon grease to cook it in was what made it for her. She would often wrap up the cooked bacon and put it in her icebox to use for some other recipe.

Now I know some of you are throwing your hands up at the thought of the bacon and using the grease but it can be adjusted. You could eliminate the bacon altogether, Grandma would never know, and use corn oil or a healthy margarine. Just have enough to fry up your onion and corn. I don't think I would use olive oil because it would change the taste some. A skim milk instead of regular or cream is okay as well. The crispy bits of corn and onions are what you will love.

Try this, adjust it to fit your families liking or health needs. Grandma and I will understand, "just don't let it burn, child."

Sunday, August 9, 2009

Oh Boy, Crab Cakes...


Living in Maryland near the Chesapeake Bay makes me happy, it may not be my beloved Ole Miss and the Gulf of Mexico but it offers up some of the best seafood treats available. My favorite is the Blue Crab and all the goodies you can make from it after the fun of picking it all apart. There are many who wouldn't even attempt to break one open and dig out the lumps, eating them one by one, because of the major mess involved, but to me part of the fun of eating steamed crabs is the picking and making a messy pile of shells and legs.


For the less adventurous ones there is the wonderful crab cake, rich and golden and loved by many, this fabulous treat is something I can't get enough. If steamers are not available or too expensive the seafood shops or grocers offer crab meat by the pound. You don't need to have the terribly expensive lump, although it is wonderful if you do, when the back fin and even what they call special (which is a mixture of back fin and leg meat)is perfect for crab cakes. Make sure you buy fresh and with a few ingredients you are on the road to a seafood delight.


When it comes to making your crab cakes or even eating them steamed it isn't properly prepared without Old Bay Seasoning. Old Bay used to be a Mid-Atlantic seasoning but I am sure it is now available country wide. It is the prefect blend of spices and salt to set off the delicious crab meat. Here is my families recipe, it is the one most requested by everyone that visits us during the summer.

One Pound fresh crab meat
1/3 cup bread crumbs
2 tablespoons Old Bay Seasoning (little less if you like yours milder)
1/4 cup mayonnaise
2 tablespoons melted butter
1 teaspoon Worcestershire Sauce
1 tablespoon chopped parsley
1 teaspoon yellow mustard
1/8 teaspoon black pepper

Stir together all ingredients except for the crab meat. When blended, then slowly stir in the crab meat trying not to break it up too much. When all is mixed, make into patties. Depending on size wanted it will do between 8 and 12. Size and quantity is your decision. Place on plate, cover with wrap and put into the refrigerator for an hour. Putting them into the frig helps blend the flavors and helps them stay together when cooking. There are two equally good ways to cook them, one, melt a tablespoon of butter and a tablespoon of oil together in a frying plan and fry them on a medium heat, turning once when you see the edges turning golden brown. Cooking time is around ten to fifteen minutes on each side. Don't mess with them or they will come apart since they aren't loaded with bread filler. Remove the little golden cakes from the pan and serve warm however you like them. We love crackers and fresh tomatoes with ours. The second way to cook them is baked in a 375 degree oven, on a greased baking sheet, for 10 to fifteen minutes on each side until they are golden brown. Again, serve warm however you like them.

For a fun treat to serve as an appetiser, make the mixture into balls, about the size of a walnut or golf ball, and deep fry them till golden brown. Serve them with a great seafood dipping sauce and you will be the hit of the party.

I hope you try them, they are much easier than you think. If you love to order crab cakes when you're at the shore or a seafood restaurant you'll enjoy having them for a special weekday meal. We sure do!

Wednesday, August 5, 2009

Jewels of Summer...

Wordless Wednesday brings you a few of my favorite summer jewels... Butterflies! I even have one in my blog heading. Enjoy.


Sunday, August 2, 2009

Southern Gold...


A couple of days ago, while riding alone in the car with my Dad, we had the opportunity to talk about his problems with his garden this year. It seems he can't get much to grow and of course he blames the weather, as we all do when a garden isn't putting out. It is either too much rain or not enough. Too many bugs or none around to pollinate. As he was complaining about his lack of yellow squash he said "oh well, we always have cornbread." I wasn't really sure about what cornbread had to do with the poor garden but I got his point anyway and that, no matter what, we can always have cornbread. Cornbread is the golden jewel of a southern meal no matter what you are serving. Whether it be a mess of greens, squash and onions, sliced fresh tomatoes or smothered pork chops, corn bread is the one thing that can make a meal terrific. I love mine slathered with butter and broken in pieces to get small bites with everything else I'm eating. Dad loves his just straight from the old pan and right into the middle of his plate to soak up all the good juices. He always makes sure to take an extra piece for the end of his meal and with that he breaks it up into a tall glass of buttermilk that he eats with a spoon as his dessert. Sometimes he can be found later in front of the TV with milk glass in hand spooning up the last of the corn bread so not a drop is wasted.

He loves it that way, but over the years I have starting making it quite different at my home. I use the same cornbread recipe as usual but I add some extras to give it my favorite kick. After mixing the cornbread batter I stir in 1 cup of drained yellow kernel corn and then add 1 cup of shredded sharp cheddar cheese. I always use my round black skillet for baking. To prepare my skillet I have added 2 tablespoons of corn oil and put the skillet with the oil in a hot 450 degree oven until the pan is very hot and the oil is starting to bubble. I remove the hot pan and pour my wet corn bread batter into the middle of the oil. The hot oil spits and spatters as the cool batter spread out into the hot pan. The oil slides up the sides of the cornbread, that besides keeping it from sticking, it starts to make a wonderful crunchy fried style crust along the top edge. So good I may have to go stick one in the oven for lunch. When it is golden brown and crusty on top I remove it from the oven and slice it into squares or pie shaped wedges. The extra ingredients give it a taste so special and unique. I have added some crumbled bacon to the top of the batter or even chopped peppers stirred in when I am in the mood for something a little different and that is fabulous too. I guess you can add anything that's your favorite to this southern gem and come out with a slice of your own heaven. Dad's right you know, don't matter what you got to serve for dinner since we always got cornbread.